Its winter here in southern Australia (June, July & August), and a good chance for some modelling to while away those "too cold to go out" times. I decided to make another fold up layout companion for Commercial Street. The same size yet it would complement Commercial Street with trains to and from a terminus. In the port of Adelaide in South Australia, there used to be a terminus, now gone and nothing remains of the site. Now it is a police station, car park and a railway museum. My design is a very much condensed but I think quite interesting plan to run passenger and goods trains from and to Commercial Street, along with somewhere to store (and lets face it - show off ) one's locomotive fleet.
 |
| The connection to Commercial Street is at the top right hand end of the drawing. |
Few photos are available of the old station, originally called Port Adelaide but later in life was renamed Port Dock.
 |
| The original station building that I want to make a model of, with its painted stone work and red brick quoining. A quite handsome building, attached to the end of the barrel roof canopy. |
 |
| The basic fold up baseboards shown here with the turnouts laid out to see if its going to work off the drawing. |
Some tweaking of the placement of the tracks was needed but essentially it laid out like the drawing and would work. The hinges which will be hidden under a lift off bridge are seen here.
 |
| Shown here the two fold up layouts are connected to see if the track will line up from Commercial Street. |
Once happy that it would work, then track laying commenced with PECO code 75, the same as on Commercial Street. The track coming through the opening at the end of Commercial Street needed a slight realignment to match up so a short section of about 100mm of track needed lifting out. Having laid all the track I had completely forgotten to install the under track magnets for shunting. I use Kadee Couplers on everything so the strategic location of magnets makes shunting a real enjoyable experience. Hands free operation of shunting movements keeps things a little more real for me.
 |
| The join between the old and new baseboards with the small re-alignment. |
 |
| The two magnets seen here with both Kadees activated. |
I use two button battery sized rare earth magnets as uncouplers. I drill two 10mm blind holes, place in the magnets attracting each other and lay the track directly over the top.
 |
| A reground 10mm drill bit is used to drill two blind holes just deep enough to accept the magnets. They don't need to be glued in if the drill size is a neat fit for them. |
The 10mm drill was ground to an almost flat profile. This was done to stop the drill from grabbing the timber as it drills through. Its far more predictable than a standard profile drill bit which can grab without notice.
 |
| The two magnets side by side - attracting each other, NOT REPELLING |
 |
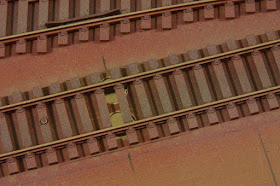
| The completed installation - very quick and easy. I usually mark the magnet's position with either a small post or a painted mark on the side of the rails after the ballast is done. |
The magnets are 10mm diameter and 3mm thick......
Next post I'll discuss the Locomotive shed floor and ash pit construction. A task that is made easier before ballasting. Till then - happy modelling!

No comments:
Post a Comment