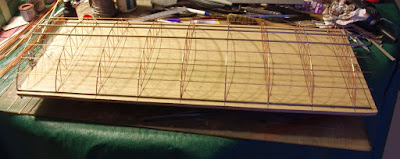
Station canopy construction. I draw a pattern using the computer and print it out, cut it to shape and glue it to a piece of timber. This forms the jig on to which I bend wire to shape around the jig to form the frames.
 |
| Using the photos to get the right look and arrangement of the bracing. |
 |
| I drew up a pattern for the canopy frames to suit the model dimensions. |
I made enough trusses for the model and made only one front end truss as it was different to all the others.
 |
| Nails to use as guides for making the frames. |
 |
| Using copper wire that has been work hardened, the joints are soldered to form the truss frames. Each frame will be the same as the next. |
 |
| The front most truss frame was different in that it was deeper to hold the timber panelling. Only one of these was needed. |
 |
| Another jig plate was made so I could form all of the frames together to create the canopy structure. |
 |
| Canopy ready for placing on the model. |
 |
| The canopy was made so that it slipped in between the post rails. |
 |
| Canopy in place and glued in with Supa-glue |
I made the end valance from 1mm match-board styrene, drilled holes in the ends, shaped the ends (bottom of the timber planks) with a needle file, drilled a hole in each plank and cut out where the telegraph wires went through......painted and weathered to match the old photos....including the part missing battens and slightly skewed last plank on the right hand end of the valance.
 |
| Styrene scribed sheet or"match-board" valance. |
 |
| Painted and weathered ready to glue onto the end of the canopy. |
 |
| The resulting model now painted and compared to the prototype it has that distinct likeness. The internal telegraph poles were also made and placed on the platforms. |
 |
| Even though the model is only about half the length it should be, I think the right "look" and atmosphere has been created. |

No comments:
Post a Comment